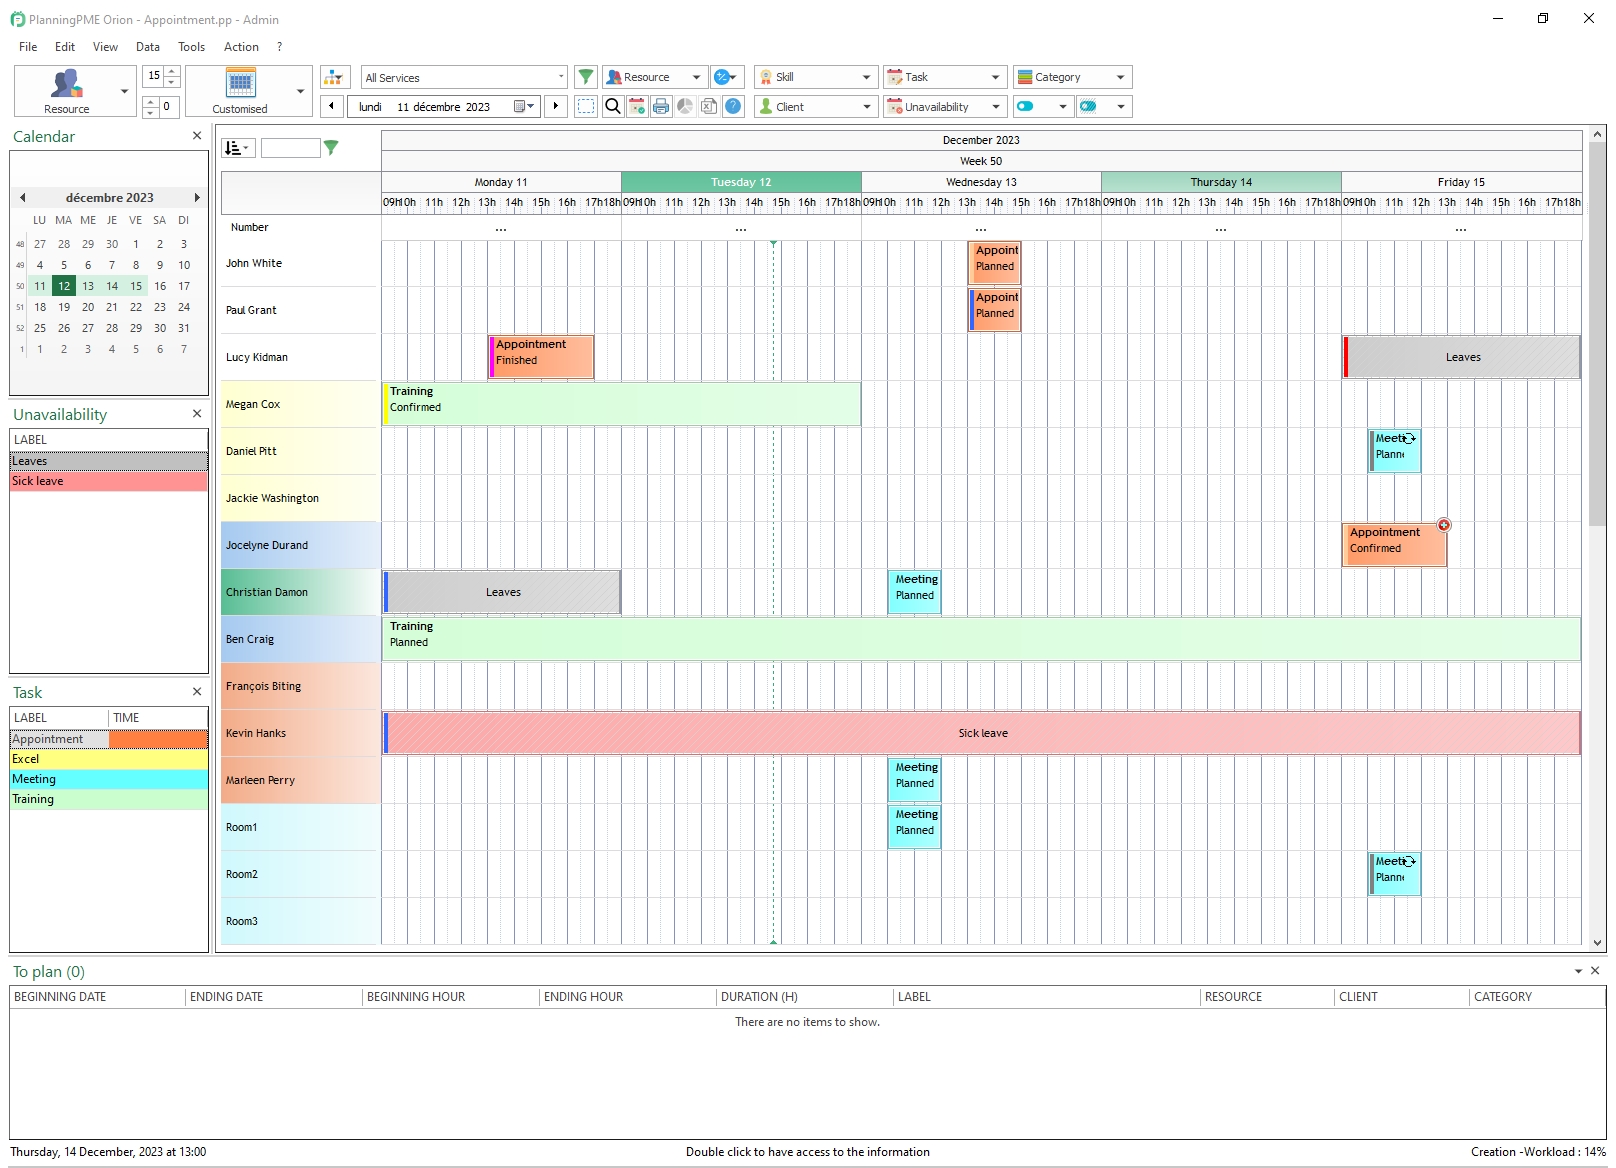
Introducing the software interface
Learn how to use the menus and features available in your planning software to effectively manage your human and material resources on a daily basis.

The menus
- Document: database location, license management, calendar sharing, printing.
- Edit: copy / paste, search, lock tasks.
- Display: filtering and setting information displayed on the planning area.
- Data: add/modify/delete data such as resources, clients, categories, services, holidays…
- Action: Creating a new event or a new unavailability.
- Tools: reports, statistics, options…
The different types of schedule views
The default display of the schedule is the Resource view. You can chose another view via the drop-down menu:
- Resource
- Task
- Client
- Project
- Agenda
- List
NB: You can select the number of lines visible on the screen. You can also filter the lines through the search box.
Views by period
- Daily
- Weekly
- Customised: select the number of days you want to display on the screen.
- Monthly
- Quarterly
- Yearly
Filters
- Department: to display only the resources belonging to the selected service.
- Resource: to select the resource(s) whose schedule you want to display.
- Category: to display only the tasks matching the selected category.
- Skill: only the resources with this (these) skill(s) will be visible on the schedule.
- Unavailability: only unavailabilities matching the selected label(s) will appear on the schedule.
- Occupation: to display only the resources available or busy over the chosen period.
- Task: only the tasks matching the selected label(s) will display on the schedule.
- Client: to display in the planning area only the events that are related to the selected customer(s).
- Project: to display on the planning area only the events that are related to the selected project(s).
- Green filter icon: allows you to define and save multiple combinations of filters.
- Custom filters: allows you to view your customised fields as filters.
Shortcut keys
- Selection Mode: to select multiple events by drag and drop on your planning area.
- Search: to run a keyword search on your events.
- Availability search: to find the resources available for a specific mission. If you want, you can specify search criteria.
- Printing: print the view of your schedule.
- PivotTable: all information concerning resources, clients, projects, tasks and unavailabilities can be exported to Excel as precise and accurate reports.
- Planning templates in Excel
- Help for the program: link to the online documentation.
The panels
If you want to, you can display panels on the left-hand side of the software to get an easier and faster access to the planning tools.
To display those panels, click on the View / Panels / Display menu.
Once the panels are displayed, you can close the ones you're not interested in.
- Calendar: to reactivate this panel, click the view by period button and then select "Display the panel calendar".
- To plan: to re-enable this panel, click the Data/Resources menu, and then click the "Show the panel" button. All the "to plan" events are listed in this panel. Via a drag and drop on the planning space, you can assign events directly to the available resources.
Planning space: creating events and absences
The events: On the schedule, an event is represented by a full colour rectangle.
Different ways to create an event
- Draw a rectangle on the schedule using your mouse.
- Double-click on a blank area of the schedule.
- Right click on a blank space on the schedule and choose "New event".
Absences / unavailabilities: A case of unavailability is represented in the schedule by a hatched coloured rectangle. This indicates, for example, that an employee is absent or that some equipment has broken down or otherwise unavailable.
Different ways to create an unavailability
- Draw a rectangle on the schedule using your mouse by holding down the CTRL key.
- Right click on a blank space on the schedule and choose "New Unavailability".

