
Personalise your schedule
Choose your preferences in order to have a planning system that suits your business activity.
Personalising the data labels
Display preferences
Date and time formats
Choice of the language
Choosing a logo
The working week
Customisation, styles and colours of the information displayed
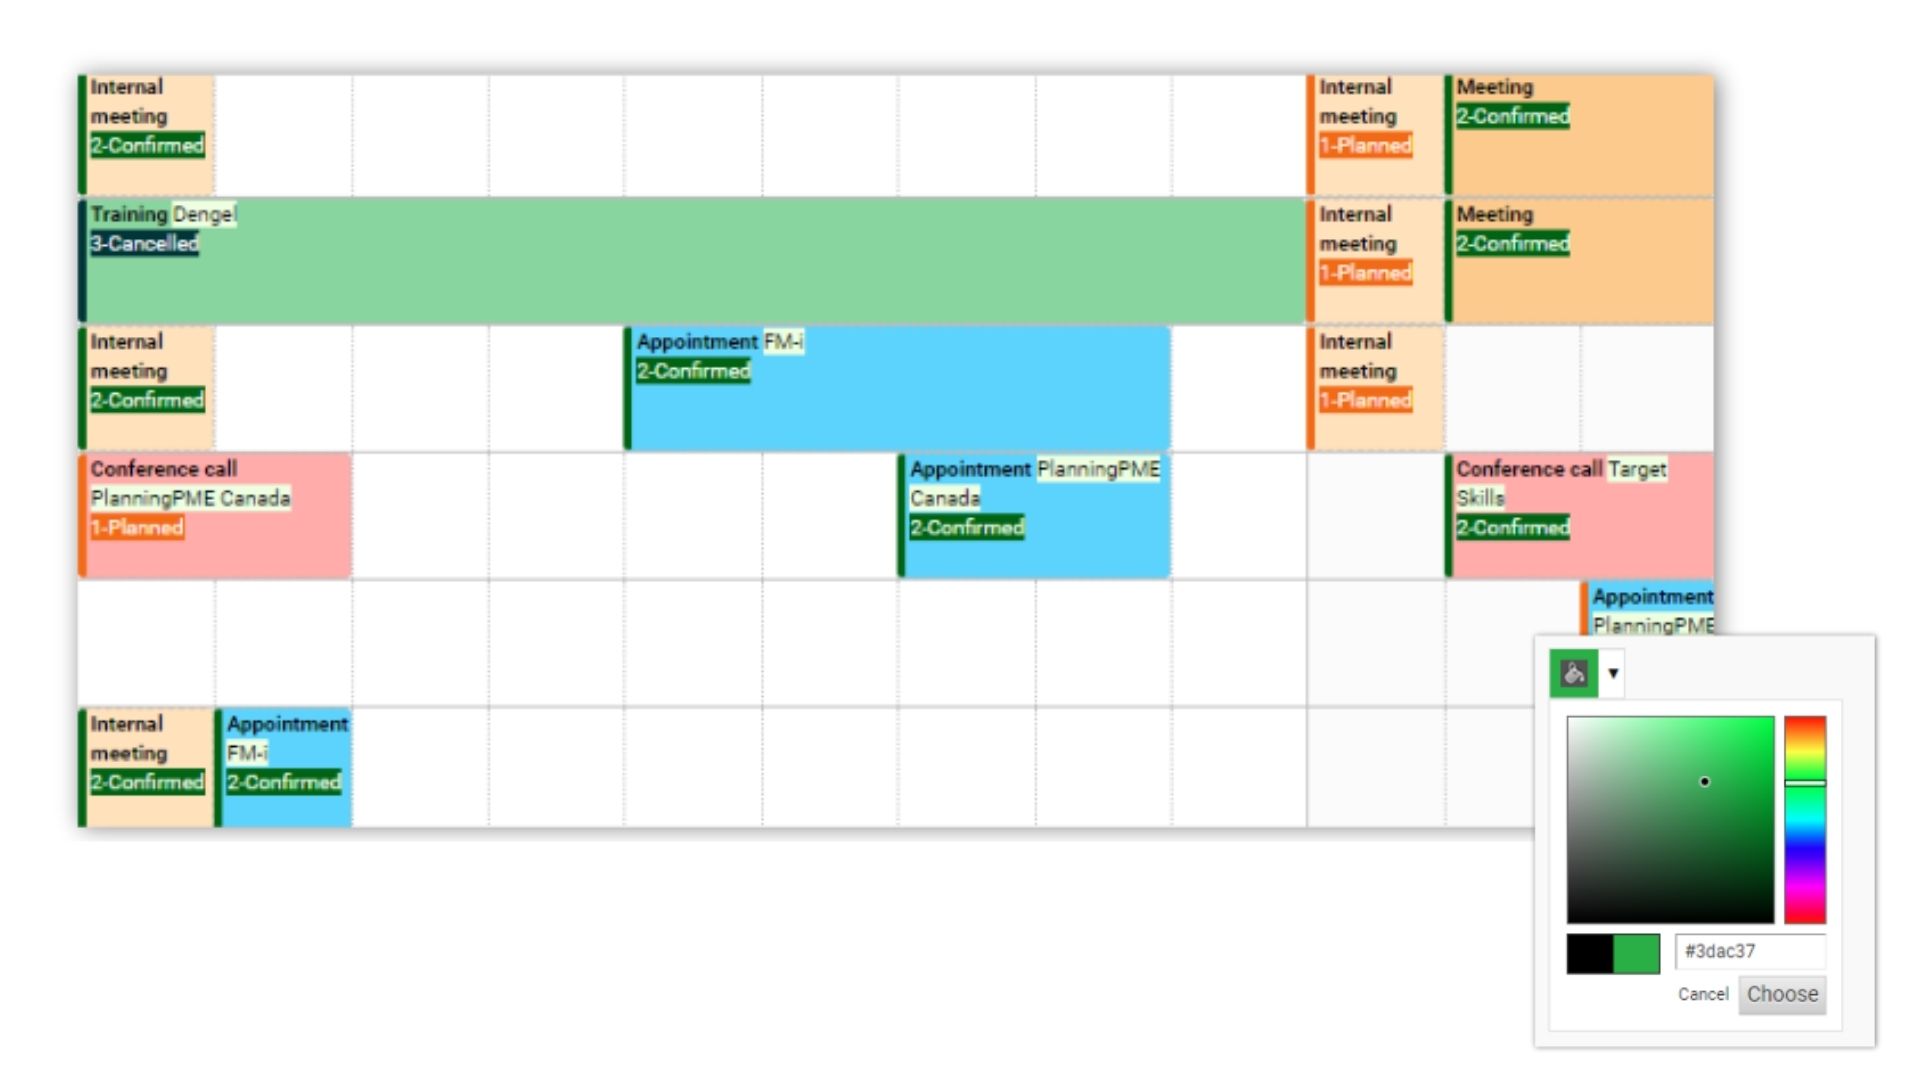
From the menu Tools - Description, you can customise each item displayed on the schedule, whether in the box representing an event, in the tooltip or even in the e-mail and printouts. Depending on the type of description you choose, various options are available to customise its appearance: line breaks, italics, bold, element colour, specific colour, etc.
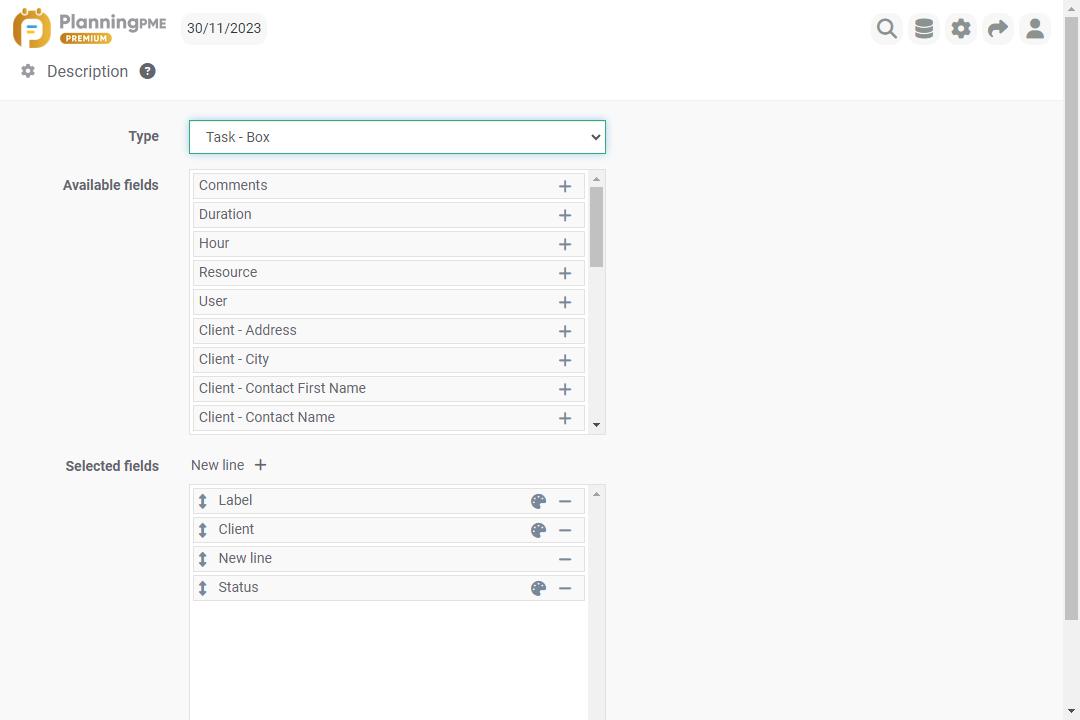
Description types
Select the fields you wish to display in the different types of description available.
- Agenda - Description : line below the box in Agenda view
- Agenda - Box : box in agenda view
- Calendar - Body : body of synchronised calendar events
- Calendar - Title : title of synchronised calendar events
- Client - Header : first column of client view
- Client - Caption : caption located under the client field of the event card
- Context - Box : box representing the context
- Equipment - Caption : caption located under the equipment field of the event card
- Unavailability - Print : print unavailability
- Unavailability - Box : box representing an unavailability
- Project - Header : first column of project view
- Project - Caption : caption located under the project field of the event card
- Notify by email - Body : e-mail body
- Notify by email - Subject :e-mail subject
- Resource - Header : first column of resource view
- Task - Print : print a task
- Task - Tooltip : tooltip displayed when mouse-over on an event
- Task - Box : box representing the task
Choice of style and colour by element
Customise the style and colour of a selected field by clicking on the colour palette icon.
- Button: For fields of the type full address, phone and e-mail, you can display only the cickable icon, hiding associated text.- The label: Whether or not to display the field label in front of its value
- Style: Normal - Bold - Italic - Underline
- Colour :
- custom : choose a text colour for the element
- default : box colour See next chapter
- of the element : colour assigned to the element
Choice of box colour
The event is represented by a coloured box : this colour depends on the choice made in the software from the menu Tools - Options - Event.
You may select the colour as a function of the:
Task label: The rectangle takes on the colour of the events task label.
Category: The rectangle takes on the colour of the events task label.
Client: The rectangle takes on the colour of the client associated with the event.
time management: This uses the "Time slot" buttons available in the event and which may be personalised using the menu Tools -> Options -> Time slots The rectangle takes on the colour of the slots associated with the event. This option is particularly useful in managing shift working .
Project: The rectangle takes on the colour of the project associated with the event.
Default colours
From the menu Tools -> Options -> Display, you may choose default colours for all the following elements:

Personalising the data labels
From the menu Tools -> Formats, you may rename the default terms used in the software: task, client, project, category, etc.

Display preferences
Size and Zoom
From the menu Tools -> Options -> View, choose the size of the text displayed in the boxes.
Moreover, each user can increase the default size of the schedule by adjusting the browser zoom directly. The Web application adapts perfectly to these settings.
Maximum line height
From the menu "Display", you may specify the maximum height of a line in the system. By increasing the height of the lines, the quantity of information displayed is increased but, at the same time, the number of lines visible on the screen at any one time is reduced.
Line separator
From the menu Tools -> Options -> View, you can choose a thicker line.
Individual first column width adjustment possible
To modify your preferences, you can adjust the left-hand column width in the following views: resource, client, project, task.
Date and time formats

From the menu "My Profile", you can also choose date and time formats.
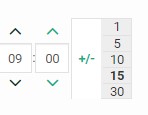
Minute step : to set the minute interval when selecting the start or end times of an event
Choice of the language
From the menu "My Profile", each user can choose the language of the software.
Choosing a logo
The logo in the top left-hand pat of the screen above the filter area may also be personalised To do this, send us your logo in bitmap format, 45*45, and our technicians will incorporate it into your system.
The working week
From the menu Tools -> Options -> General, you may choose the days and hours that comprise your working week. The default profile for your resources will then take account of such parameters.

The working week: The working week: If you untick Saturday and Sunday, these two days will not appear in your planning space.
First day of the week: Choose the day to be the first working day of the week: Thereafter, on the calender, the first column will represent the day chosen to start the week and the scheduling will start the week based on that day.
time management: You make your choice of preferences concerning time slots here. They will be displayed according to the views - morning, afternoon, full day.
These data will be taken into account in calculating hours for exporting into Excel.