
Printing and disseminating the work schedule
Need to print the activity schedule of your employees? With PlanningPME, it is possible. You can print the schedule at any time to distribute it to your teams by choosing the type of view you want.
Printing an event
Need to print an event? You can now print each event on paper or in PDF format, and choose the information you want to include in the document.
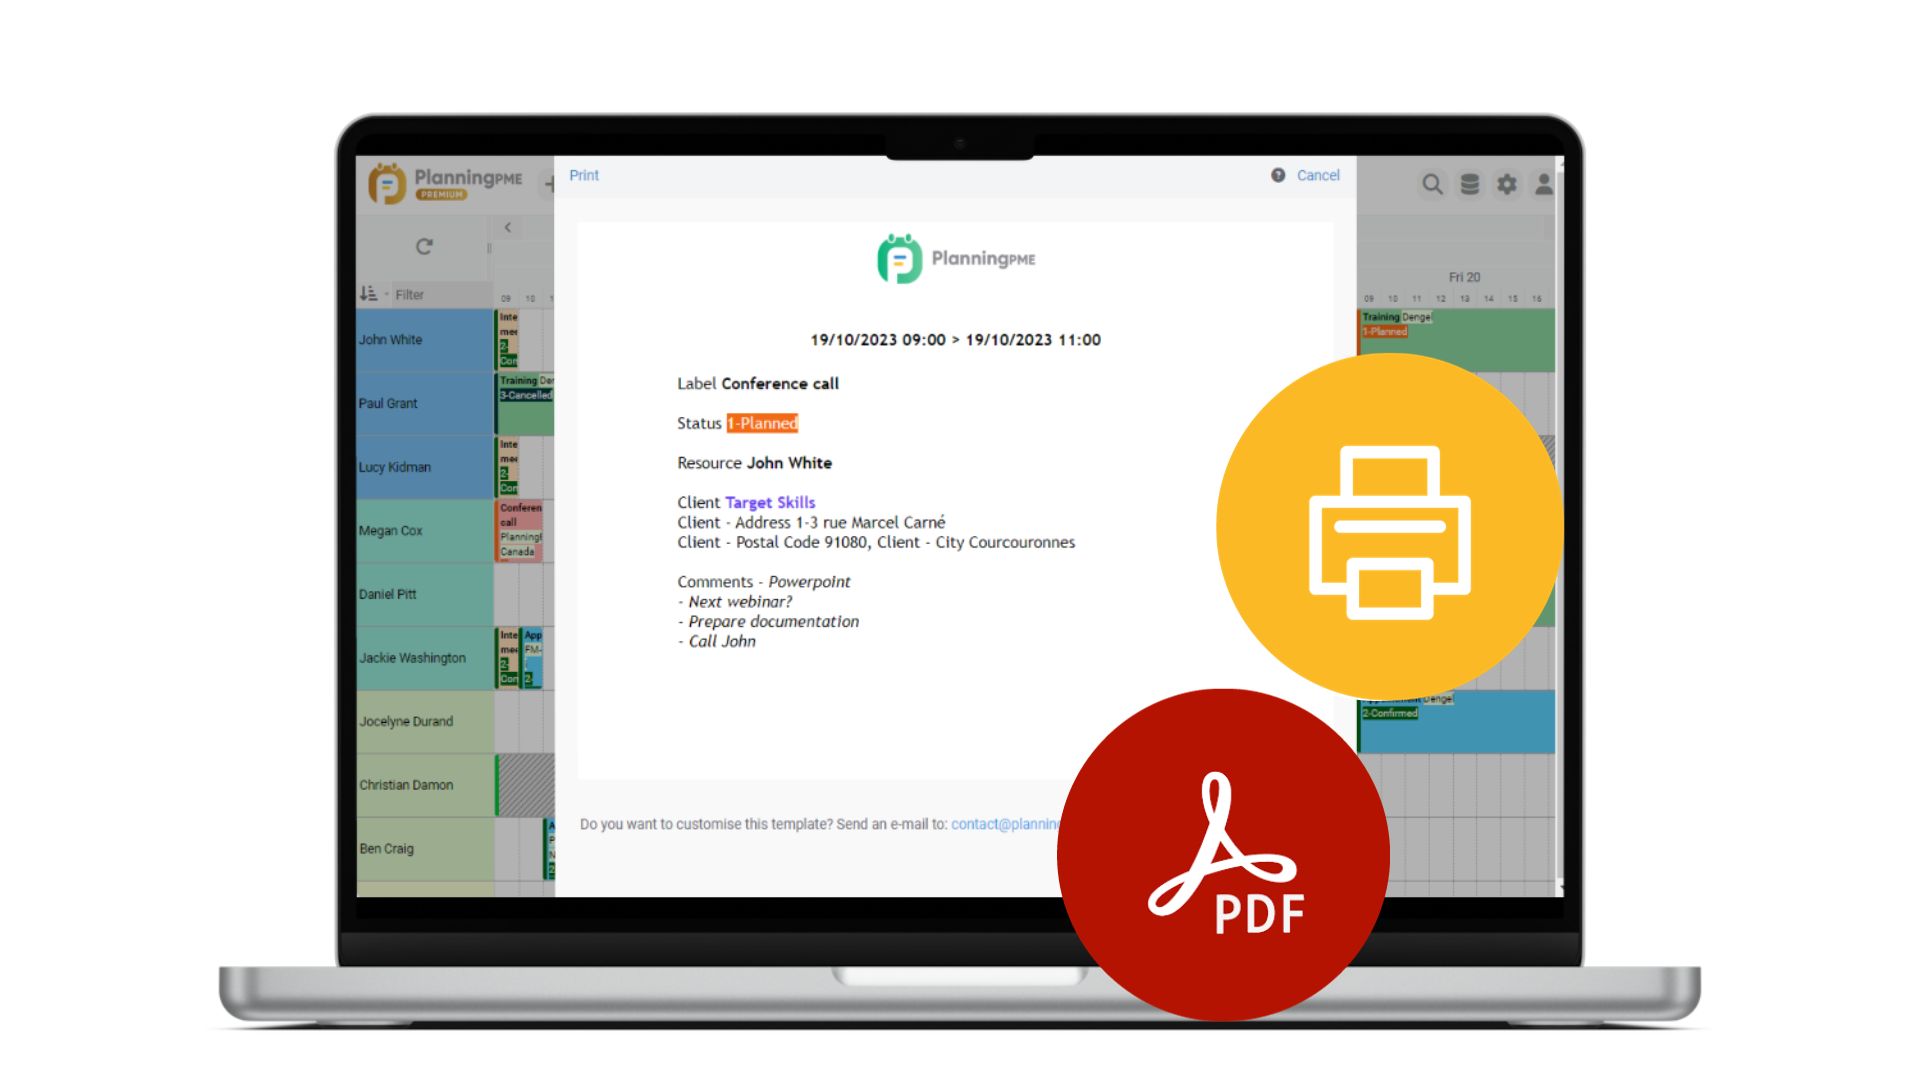
How do I print an event?
On the schedule, right-click on an event and then "Print".
This function is available for task and unavailability events.

Selecting the fields to be printed
To choose which fields to print for the task or unavailability, go to the menu Data -> Description -> Task - Print or Unavailability - Print. Then choose the data you want to print from the standard and custom fields available.
You can choose to print standard fields such as resources and projects, and also custom fields that you have created (text, comments, file information, numbers, signature information, etc.).
For more information, see the chapter: Personalise your schedule.
Would you like a personalised form with your logo and layout?
It is also possible to have several prints corresponding to different needs: a job sheet, a report, a form, etc...
For a customised printout, please contact us.
Printing the graphic schedule
Printing the graphic schedule
Go to the menu Tools -> Print
The schedule that will print is the one you see on the screen with all the various filters applied.
For example, to print the monthly schedule for a department, first display the month and filter by department, and then print.
Printing colours
Depending on the Internet browser that you are using, the background colours and graphics are not always printed.
Internet Explorer: From the menu Tools -> Print -> Layout, you may tick the option: Print the background colours and graphics.