Event management through the status
Definition
How to activate the status?
Custsmise your status list
Assign a status to an event
Filter the schedule by status
Access right management
Rename "Task status" and « Unavailability status » with your own words
Definition
For each event of the schedule like a task or an unavailability, you will be able to specify a status.
For example, you will be able to precise:
- if a day off is in the “on request” or “validated” status
- if a meeting is in the « Not started » or « Finished » status for example


The list of the task and unavailability status is entirely customised according to your business.
How to activate the status?
To begin with, activate the option in the menu Tools -> Options -> Event and select what you want to activate :
- Status of a task
- Unavailability status
Custsmise your status list
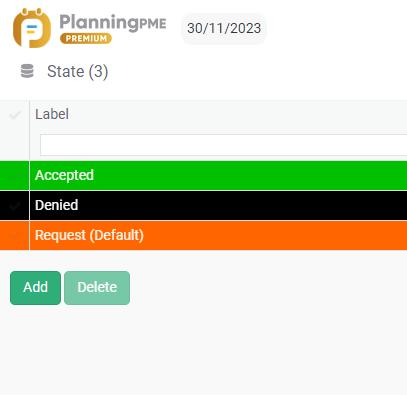
You can define two list of distinct status directly from the menu “Data”:
- Status of a task : Customise your status list for the event such as “Tasks"
- Unavailability status : Customise your status list for the events such as “Unavailabilities”

Assign a status to an event
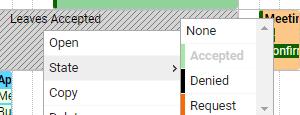
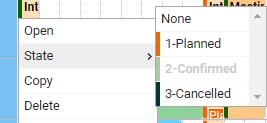
For each event created on the schedule, you can also assign a status to the event.
Then, you will be able to modify it with a simple click on the event

Filter the schedule by status
You can also use the filters “Task status” and “Unavailability status” at the top of your screen to filter the events in the schedule
See the chapter on Scheduling filters.
Access right management
See the chapter on User access management.
Rename "Task status" and « Unavailability status » with your own words
From the menu « Tools » -> "Labels and formats", you have the possibility to rename these labels “Task status” and “Unavailability status” with your own words.

