
Unavailability, absence and holiday management
Unavailability arises when a resource is unable to be used, for example, for reasons of absence or breakdown/maintenance. An unavailable human resource may arise from planned holidays, sickness, maternity leave, time off, etc.
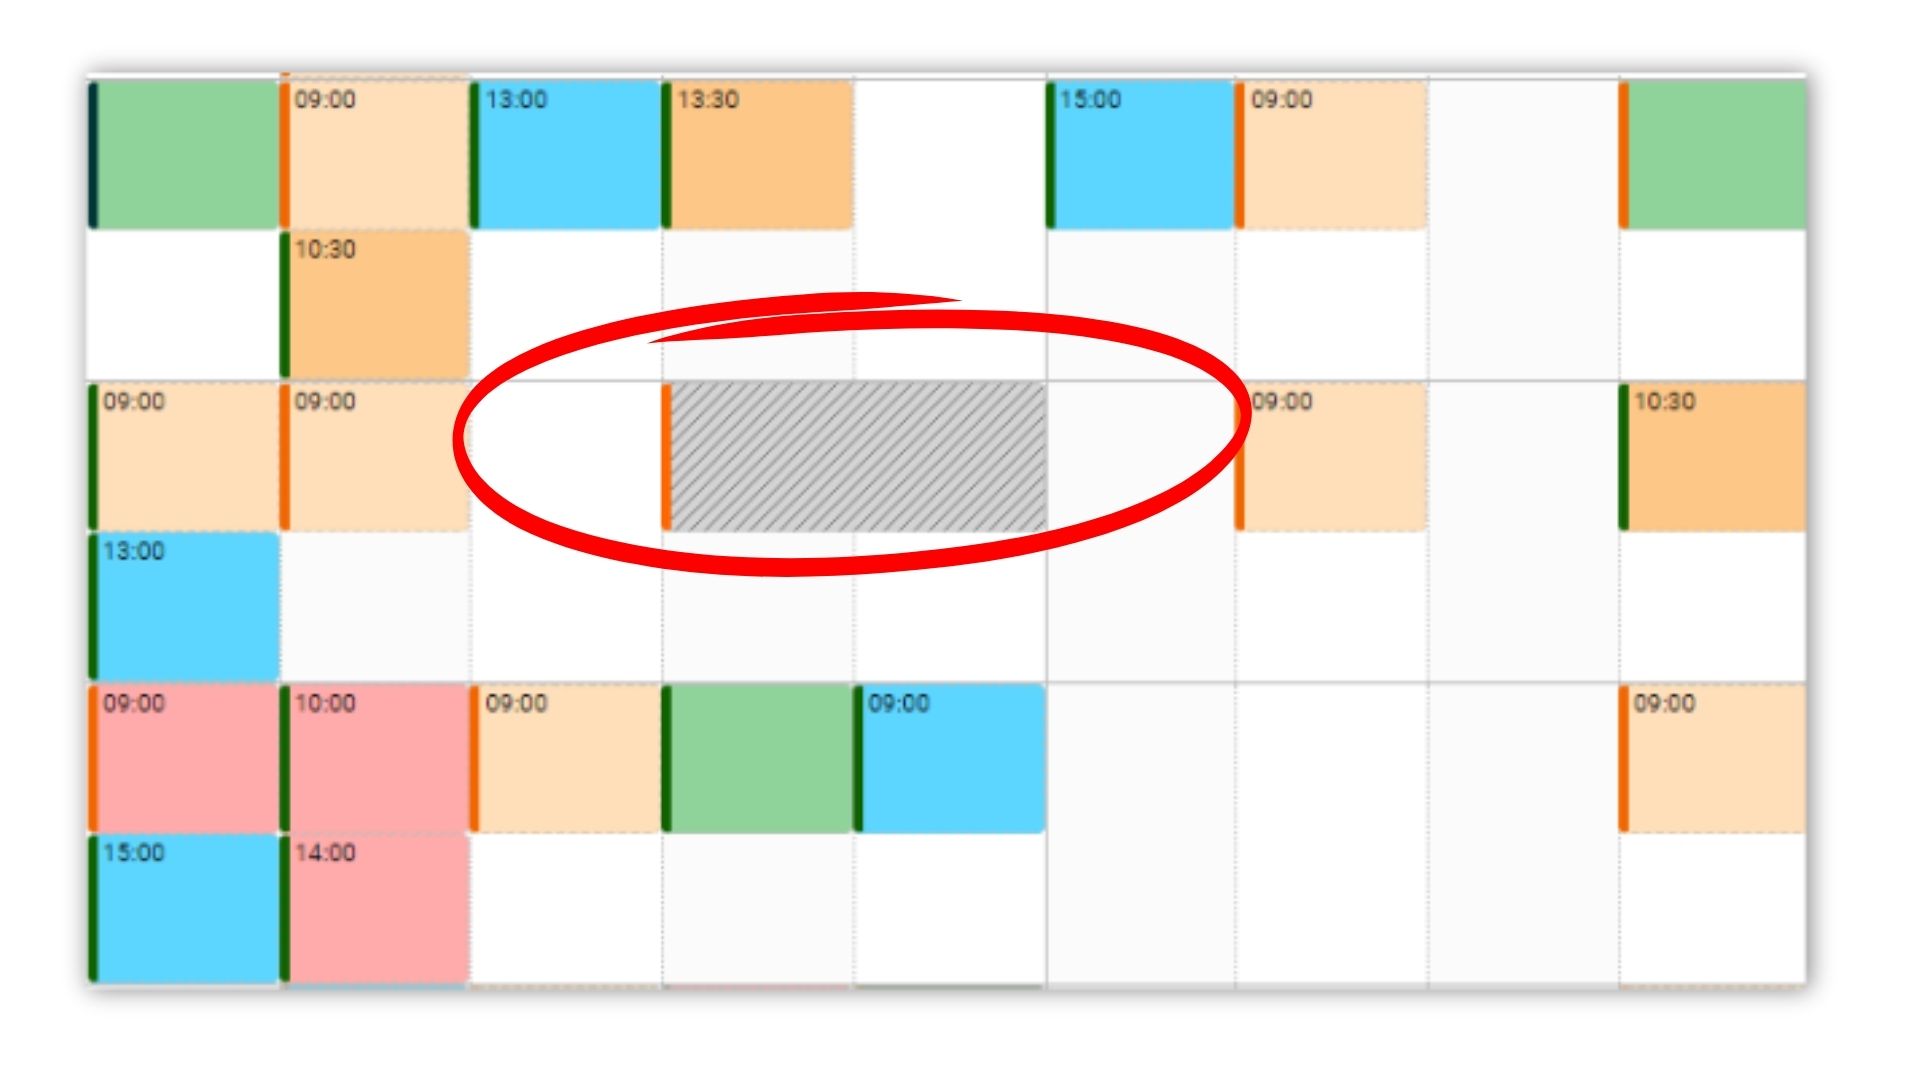
A case of unavailability is represented in the schedule by a hatched coloured rectangle. This indicates, for example, that an employee is absent or that some equipment has broken down or otherwise unavailable.
Quick creation of a leave request
Leaves setting
Track leaves and unavailabilities by resource
Leaves request management workflow
Alert message and leave tracker
Initialising public holidays
The working week
Creation and modification of an "unavailability"
Various ways of displaying unavailability
-> Draw a rectangle on the schedule by left-clicking and pressing the ALT key on your keyboard.
-> Simply left-click with the ALT key pressed on an empty space on the schedule.
-> Click on the Add button "+" and choose "New unavailability"
The window below will be displayed:

Modifying an unavailability
-> Double left click on the event
-> Right click then "Open"
-> Drag/Drop: drag and drop the absence directly onto a new date and/or onto a new employee.
Available options
Just as for creating events in the schedule, these various options are available. See the corresponding chapters in the section Event scheduling
Copy and Paste
Assigning a leave of absence to several resources
Managing recurring absences
Quick creation of a leave request
A new entry is available from the menu "+" at the top left corner of the application to make it easy for every employee to request leave.
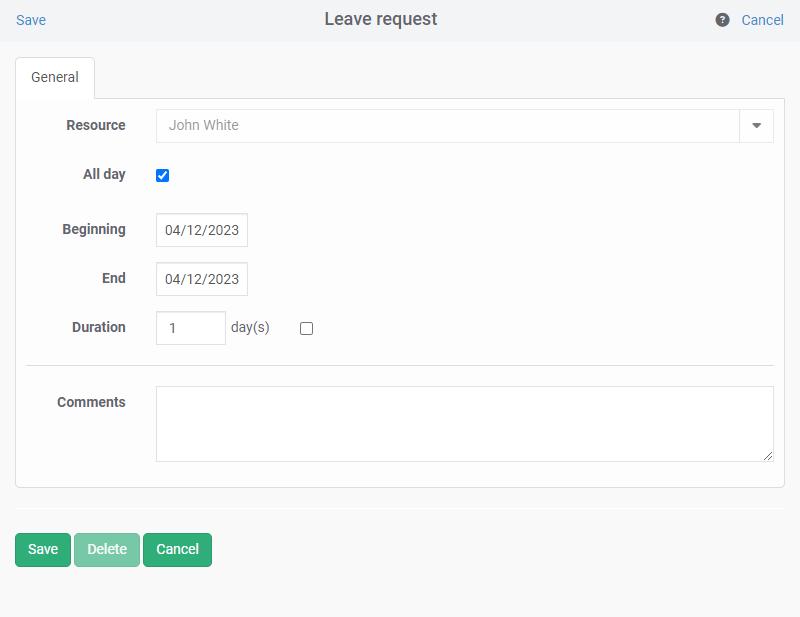
The resource concerned is the resource associated with the user. Depending on the user's rights, this association can be managed from the menu "Profile" and/or the menu Data - Users.
The label of the leave taken into account is the one selected in the menu Tools -> Leave.
Leaves setting
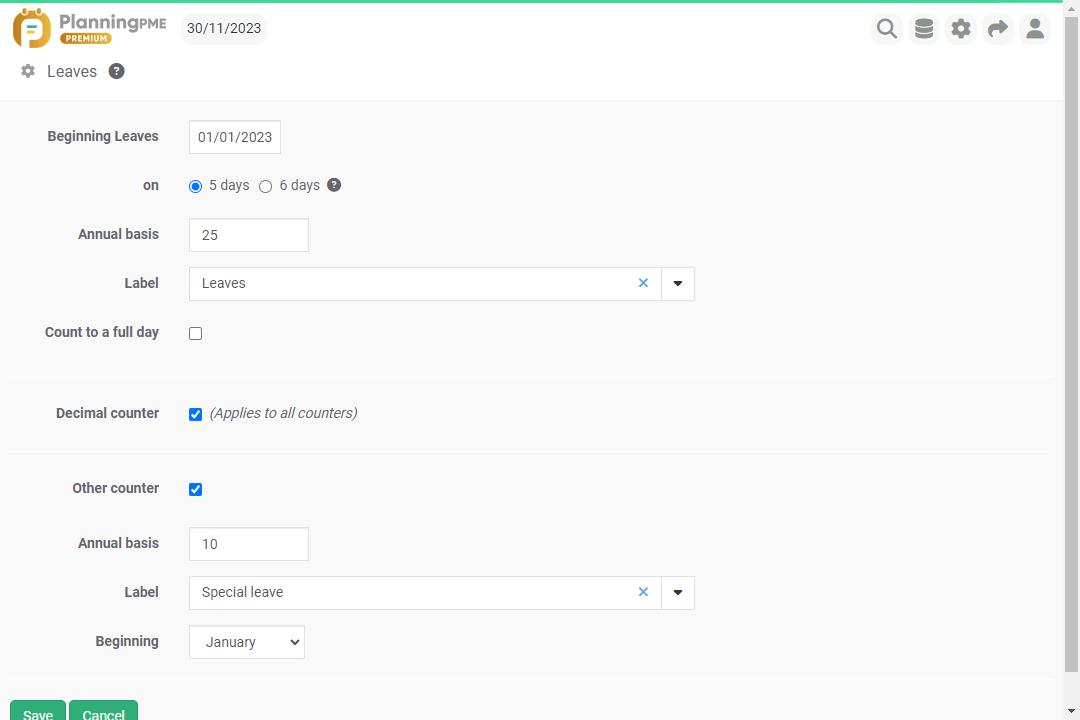
Go to the menu Tools - Leaves. Enter the information according to your activity.
Holidays
Leave period start date : Choose the start date for the start of the annual leave period (01/06/2015 or 31/05/2016 for example)
Holidays of : 5 or 6 days?
Annual basis : Holidays of 25 or 30 days
The label : Annual leave label. This is taken into account in the rapid leaves request.
Count in full day : By ticking this box, leaves concerned by this label will be counted in full days.
Counter in decimal
You can select a counter in decimal rather than in whole numbers.
Other counter
You can apply a common counter to all resources for another unavailability label.
Annual basis : Specify the common annual base
Holidays of : 5 or 6 days?
The label : Label of your choice for this counter.
Beginning : Select the period for which you want to startd the countdown.
Track leaves and unavailabilities by resource
You can track unavailability by resource and by year directly from the Unavailability tab of each resource card.
In addition, you can add a counter specific to each resource for each type of unavailability if you wish.

Leaves request management workflow
From the Premium version of PlanningPME Web Access, we can set up automatic notifications by e-mail in order to manage leaves request workflow.
Tutorial - Automatic notifications
Alert message and leave tracker
If the number of authorised leave days is exceeded, an alert message is displayed.
Initialising public holidays
Public holidays are totally configurable in PlanningPME Web Access.
Just go to the menu Parameters -> Public holidays
Using the menu Parameters ->Options -> Display, you may fully configure the colouring for public holidays.